How to Learn Double Unders: The Progression That Actually Works
Quick Answer: Double unders are a wrist speed and rhythm problem, not a jump height problem. Learn them in this order: correct rope length, a relaxed single-under rhythm with hands low and close to your hips, then the penguin drill, then singles with one double inserted, then strings. Most people fail because they jump higher and pull their hands away from their body — which slows the rope down at exactly the moment it needs to move faster.
You can jump. You can turn a rope. You still cannot do two turns in one jump, and it feels like a mystery.
It is not a mystery. It is four specific fixes applied in a specific order, and jumping higher is not one of them.

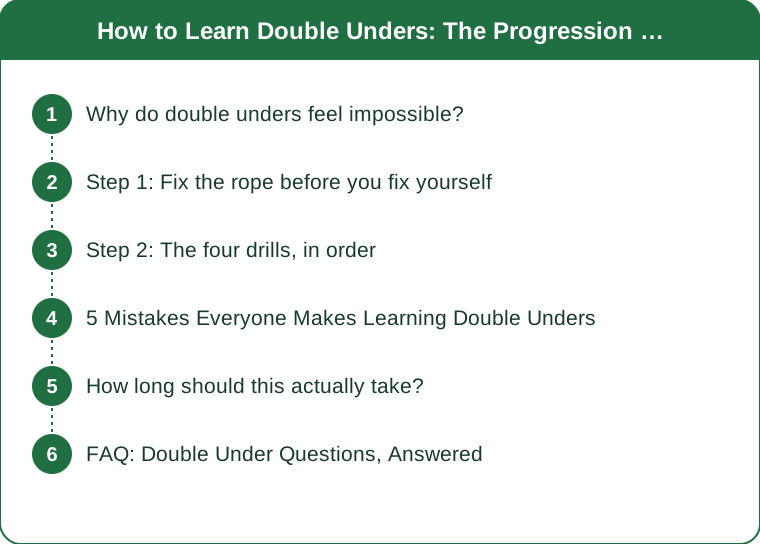
Why do double unders feel impossible?
Because the instinctive fix is the wrong fix, in three different ways.
Instinct says jump higher. More air time seems like it should give the rope more time. In practice, a higher jump means a slower, less controlled jump with a longer ground contact on landing, and it wrecks the rhythm that double unders depend on. You need about 6 to 8 inches of clearance, not 14.
Instinct says spin your arms faster. So the elbows flare and the arms start doing the work. But arm rotation is slow and rope speed comes from the wrists. The moment your hands move away from your body, the effective rope length shortens and the rope hits your feet.
Instinct says try harder. Double unders are one of the few skills where tension makes you objectively worse. A tense grip kills wrist speed, and wrist speed is the entire mechanism.
The actual physics: the rope has to travel two full revolutions in the time your feet are off the ground. At a realistic jump height that is roughly 0.45 to 0.55 seconds for two turns. You get there by making the rope move faster, not by staying in the air longer.
Why people plateau at two or three: they can produce one fast burst but cannot repeat the position, because their hands drift outward and upward with each rep until the rope no longer clears.
Step 1: Fix the rope before you fix yourself
Rope length is the single most common invisible cause of failure, and it is a thirty-second fix.
How to size it: step one foot on the middle of the rope and pull the handles up along your body. For double unders, the handle tops should reach somewhere between your armpit and the middle of your chest. A rope sized to your shoulders is a fine single-under length and too long for doubles — a too-long rope needs more air time than you have.
Rope type matters more here than for singles. A thin coated cable or a bare speed cable moves dramatically faster than a beaded or cloth rope. A heavy beaded rope is a legitimate learning tool because it gives feedback you can feel, but it is not what you will string reps on.
Handle bearings are real. A cheap rope where the cable binds at the handle cannot spin fast enough for consistent doubles no matter what you do. A $20 to $30 speed rope with proper bearings is enough — this is not a category where more spending helps.
Surface changes everything too. Concrete gives the crispest rebound, and a sprung wood floor is best. Rubber gym flooring absorbs a lot of your bounce and thick mats absorb even more, which makes the rhythm harder to find while learning.
Step 2: The four drills, in order
Do not skip ahead. Each drill fixes a specific error, and jumping to strings before the position is automatic just reinforces the drift.
Drill 1: Relaxed singles, hands at your hips. Sixty unbroken single unders with your hands low, thumbs pointing slightly forward, elbows lightly touching your sides. Wrists doing all the turning.
This is the position for doubles and you should be able to hold it without thinking. If your hands creep upward as you fatigue, you have found the exact thing that will fail you later.
Drill 2: The penguin drill, no rope. Jump without a rope and tap your thighs twice with your hands during one jump. Tap-tap, land. Tap-tap, land.
This trains the double rhythm with no rope to trip over. The taps should be fast and small, which is exactly what your wrists will do with a rope. Do 3 sets of 20.
Drill 3: High singles. Single unders with a slightly higher jump than normal, keeping the same relaxed hand position. This teaches you the jump you will use for doubles without the timing pressure. Notice you can hold this rhythm — that is the air time you have to work with.
Drill 4: One double, then singles. Five singles, one double, five singles, one double. This is where it clicks for most people. The singles keep the rhythm stable and you only have to produce one fast turn.
Then extend: three singles / one double, then one single / one double alternating, then two doubles in a row, then strings. Do not go for strings until alternating is comfortable.

5 Mistakes Everyone Makes Learning Double Unders
1. Practicing when your calves are already fried. Double unders are a high-calf-load skill and a fatigued calf cannot produce a crisp rebound. Practice at the start of a session, not at the end, and cap early sessions at 10 minutes.
2. Doing it barefoot or in flat minimal shoes at first. The repeated impact concentrates in the calf and Achilles. A shoe with some cushioning is kinder while you accumulate volume, and shin splints from jump rope are almost always a landing and volume problem rather than a rope problem.
3. Looking down at the rope. Head down changes your spine position and shortens the space the rope has to pass through. Eyes forward at a fixed point on the wall.
4. Bending the knees on the jump. A double under is a stiff, ankle-driven bounce — think of bouncing off the floor rather than squatting to jump. Tucking the knees is the classic panic move and it makes the second turn less likely, not more.
5. Practicing for 30 minutes on day one. The skill is neural and it consolidates between sessions, not within them. Ten focused minutes four days a week beats forty minutes once, and it dramatically lowers the shin and calf injury risk that derails most people in week two.
The mistake that surprises even experienced athletes: trying to learn doubles while breathing hard in a conditioning workout. Learn them fresh and calm, then take them into workouts — the reverse order teaches your body a broken pattern under fatigue.
How long should this actually take?
First single double: often within one or two sessions once rope length is right and the penguin drill has been done. Many people who have been failing for weeks get it in ten minutes after the rope is shortened.
Consistent single doubles on demand: 1 to 3 weeks of short, frequent practice.
Ten unbroken: typically 4 to 8 weeks. This is the step where most people stall, and the stall is nearly always the hands drifting outward as fatigue accumulates.
Fifty unbroken: a few months, and at that point it is a conditioning question rather than a skill question.
What speeds it up: frequency over duration, and filming yourself once a week. A ten-second phone video from the side shows hand drift instantly in a way that no amount of feeling it will.
What slows it down: long gap days, practicing tired, and a rope that was never the right length. Two of those three are free to fix today.
FAQ: Double Under Questions, Answered
Do I need to be able to do 100 singles first?
Not 100, but you should be able to do about 50 to 60 unbroken with relaxed hands. That baseline means the rhythm is stable enough to build on rather than something you are still fighting.
Why do I whip my forearms and thighs?
Almost always a rope that is too long, hands that have drifted away from your body, or both. Shorten the rope by a few inches first — the welts are informative but they are not a required part of learning.
Should I use a weighted rope to learn?
A slightly heavy rope helps you feel where the rope is in space, which is genuinely useful early. Switch to a speed cable before you start chasing strings, because a heavy rope cannot move fast enough for long sets.
My calves are destroyed after every session. Normal?
Common, but a signal to cut volume. Cap practice at 10 minutes, take a day between sessions early on, and stretch your calves afterward. Persistent shin pain means stop and reassess before it becomes a real injury.
This is general information, not medical advice.
TL;DR: It is a wrist and rope-length problem wearing a jump-height costume.
- Size the rope to armpit or mid-chest height, not to your shoulders. Fix this before anything else.
- Hands low at your hips, elbows in, wrists doing the work. Hand drift is the number one failure.
- Jump 6 to 8 inches, stiff and ankle-driven. Higher and softer both make it harder.
- Run the four drills in order: relaxed singles, penguin taps, high singles, then one double between singles.
- Ten minutes four times a week beats a long session. The skill consolidates between sessions.
- Practice fresh, not at the end of a workout. Learning under fatigue teaches a broken pattern.
Measure your rope tonight. If the handles do not reach your armpit, you have been trying to solve the wrong problem.
Keep Reading
This article is for general informational and styling purposes only. Fit, sizing, and product availability may vary.